

If you’ve ever been in the need to run a Linux VM in Azure, where you can create a resilient and scalable VM, this is the best place for you. I’ll be running through the setup as well on accessing your Linux machine securely.
Create a Virtual Machine
First, we’ll start in our Azure portal at portal.azure.com. On the home page should be “Create a resource”, we’ll select this and search for “Virtual Machine” and find the one listed by Microsoft.

In the next screen, you’ll have a lot of options. I’ll run through each.
Basics
Here, you specify:
- A subscription, which is a billing container for your resource
- A Resource group for logical containment of resources
- If you have none, you can “Create new” to generate one on the fly
- A VM Name that represents it’s name in Azure
- Region in which this VM will be deployed to, best to choose a location closest to you or your customers
- In addition to a region, you select your availability options, which allows for high availability and fault tolerance in case of hardware failover or even datacenter outages
- I will selecting “No infrastructure redundancy required”, which will let Azure auto-select which zone/datacenter to deploy this VM to. I recommend to NOT use this for production.
- Next, you’ll specify an image. You can choose “See all images” and search for your desired image. You can even create your own images using a Azure Compute Gallery
- With Linux, there is many different Distributions, I will be choosing Debian and it’s latest major version of 13, codenamed “Trixie”.
- For VM architecture, you have different compute (RISC based ARM or CSIC based x64/x86)
- ARM provides a better performance to cost, but may also not be supported by many applications and vendors. I will stick with x64
- With Azure Spot discount, you can save on cost by using unused capacity. Do note that they can revoke access at any time.
- VM Size is a critically important section, this will be the actual CPU/Memory specified for use. The bigger the vCPU and RAM, the higher the cost.
- Hibernation can also save cost by deallocating the vCPU and RAM when the machine is not in use for an extended period of time. It moves the RAM to your hard disk temporarily.
- Once you’re ready to run the VM, it’ll move the RAM from the disk and re-allocate the virtual machine.

Basics – Setting up the Admin Account
For Linux VMs, this is where it differs from the Windows counterparts. Here you can utilize a SSH public key or use a standard password.
If you’re not familiar with how SSH Keys work, here’s the big benefit: No passwords!
- A public key (that anyone can see) is stored on the Linux Server we are deploying
- This public key is linked to a private key, which should exist only on authorized machines. This private key signs the SSH Session and sends it back to the server.
- Once the server gets this signed message, it will use it’s public key (which is mathematically related to the private key) to verify the signature generated by the private key.
The only real disadvantage of SSH keys is if your machine containing the private key is compromised. This can be mitigated by:
- Using a passphrase/password before the private key is “unlocked”
- Using an SSH Agent, which can use encrypted storage
- Hardware security modules (HSMs) or using other key services such as Azure Key Vault
For Azure, you can choose to have Azure generate a new public/private key pair, using an existing key from a Key Vault or if you’ve already generated a private key on your own machine, you can provide the related public key to Azure.
- As a reminder, public keys can be shared, private keys should never be shared!
We’ll have Azure generate the key pair for us. You will have an option between RSA or Ed25519.
- RSA relies on factoring large numbers, as computer systems get better performance, this becomes easier to break. Thus the need to provide very large keys such as 3072-bit RSA.
- Ed25519 on the other hand, uses Elliptic Curve Cryptography (ECC), which is much harder to break and thus can provide smaller keys that are much faster, while providing the same strength of security as RSA large keys
Lastly, we’ll specify what Inbound ports to use from the public facing side of this VM. With SSH keys, no one except us should be able to login, but it’s still best practice to restrict logins based on source addresses if possible.
- Alternatively, consider disabling Public Access all together and access it on a private IP space

Disks
Under the Disks section, all VMs come with an OS Disk for the Operating System and a temporary disk for short-term storage for apps, processes, page/swap files.
- You can choose to add additional disks known as “Data disks” for your application and data.
Encryption at Host allows you to encrypt data stored in use, specifically at the hypervisor level and it’s memory and I/O operations.
- It’s basically end-to-end encrypted throughout the whole process for data
OS Disk Size can be specified either at the image default or higher. I would never recommend going lower than an image’s default.
OS Disk Type is how performant and redundant you want your disk.
- Standard HDDs will be retired for OS Disks in 2028
- Standard SSD should be your standard choice unless you have requirement for lots of disk usage (IOPS)
- For locally-redundant storage (LRS), the disk gets replicated in a single datacenter. This provides redundancy against host failures, but not datacenter failures. Consider Zone-redundant storage if you want to mitigate against datacenter outages
Key management is for encryption of your disks and storage. You have the choice of letting Microsoft handling the keys for you (Platform Managed Keys) or using your own keys (Customer-Managed Keys)
Lastly, you have the option for the data disk, which is separate from your OS. You can specify a size and whether you want to have the host cache frequently used data for Read or Read/Write actions.
- If you’re using additional disks, do keep in mind that this increases the IOPS. To achieve the full throughput performance. you may need to increase your VM Sku Size.

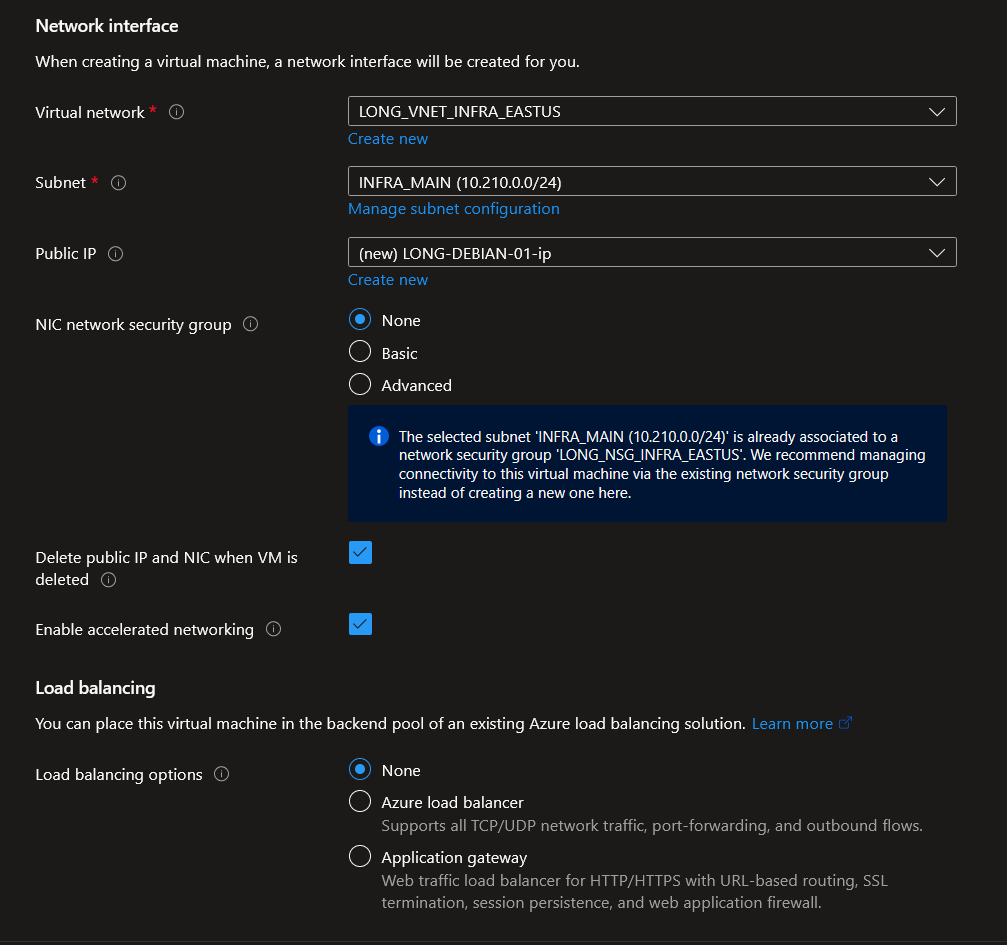
Networking
In this section, you’ll need to have a virtual network and subnet so the VM can have network functionality.
- If you don’t already have the Virtual Network configured, you can create it in this section
For the Public IP, if you’re wanting to assign a public IP to the VM, you can configure it here or set it to “none” if you plan to access the VM from a private IP space only.
For NIC Network Security Group (NSG), I would highly recommend to not configure this and instead configure a Network Security Group on the Virtual Network instead.
- Managing each NIC for every VM is not scalable in management. You will have a much easier time
- The NSG is a way to manage rules on what network traffic will be allowed through
Enable accelerated networking allows you to transmit packets through the physical network NIC rather than going through a synthetic NIC which must route through a virtual switch on the hypervisor.
- This allows for lower network latency and less CPU time to process network packets
- Also check out how this interacts with Linux in particular.
If load balancing is required for an application, you can configure this under this section as well.
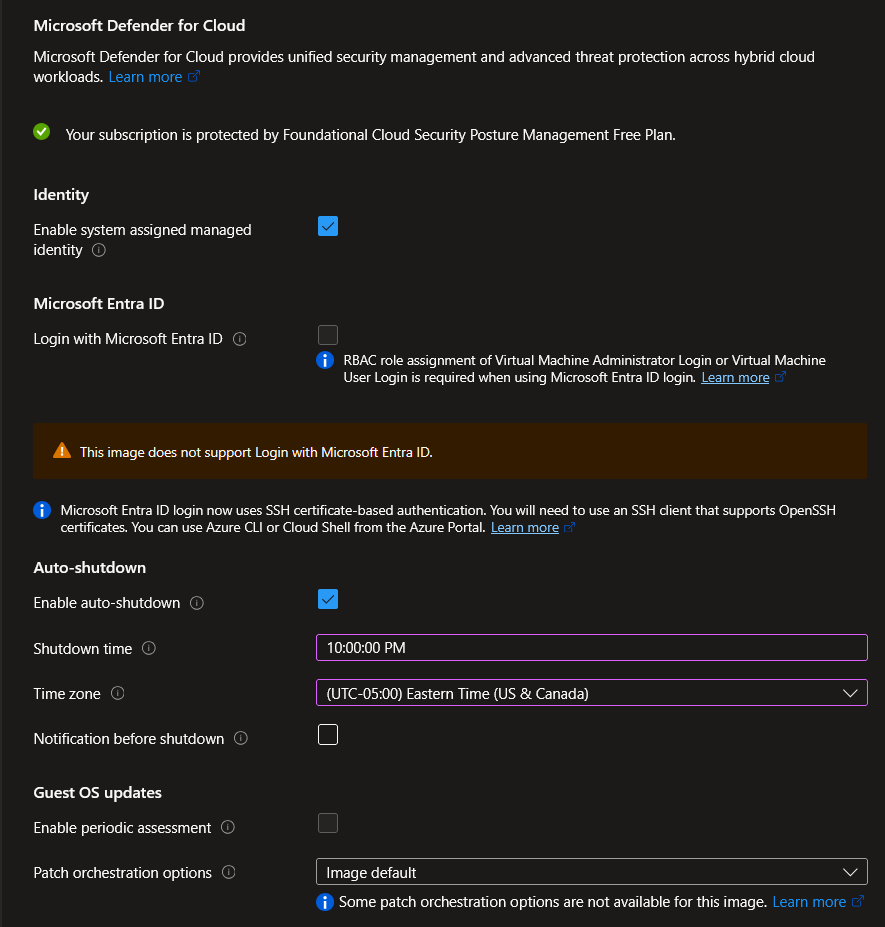
Management
We’ve configured the requirements for the VM itself. Now we need to specify how we’ll manage this VM.
Defender for Cloud can be a great option to analyze and give you an overview on recommendations on securing your infrastructure.
Managed Identities can be configured for this VM so that it has permissions to access other Microsoft cloud resources.
- We are offered a system assigned managed identity which is tied to this VM in particular. If the VM is deleted, so is the identity
- The other type is a user assigned identity, which isn’t tied to a VM. It can be used for multiple types of resources. Although this can allow for scalable usage, it needs to be manually deleted if no longer used
We are unable to login with Entra as the image is not officially supported, but do know that it is possible to login via SSH with Entra
Auto-shutdown
This might be one of the key features in saving costs. We can define when we should de-allocate the VM and thus remove the cost of running the CPU/RAM.
- We can also set notifications if required
Lastly, Guest OS updates can enable automatic updates for the VM. The Debian image does not support this.
Monitoring
For Monitoring, this is where we can:
- Configure alerts for situations such as CPU usage at 80% or greater or Disk IOPS being at a certain threshold.
- Use Boot Diagnostics to trouble boot failures and other pre-OS options
- We can choose a Microsoft managed account or use our own Storage Account
- Likewise, we can enable OS guest diagnostics to gather metrics from the guest OS itself (versus just the hardware). You’ll need to store these logs in a storage account
- Application Health is typically used for VM Scale Sets, used for monitoring and repairs.

We will be skipping the Advanced section as these are very scenario independent, but the gist is to add additional configuration, agents, scripts or applications via VM extensions or cloud-init
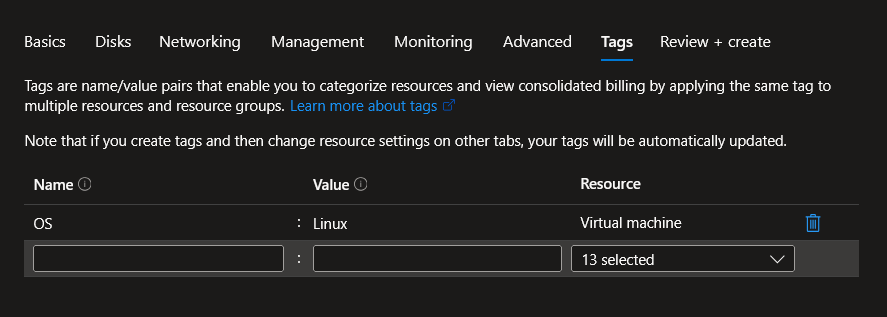
For Tags, we can categorize all (or some) of the resources. This can be used for reporting, filtering, or billing segmentation.
Finally, you will run through Review + create, which will run a validation to ensure the VM can be deployed without issue and gives a summary before clicking “Create”. We’ve passed validation, so let’s do just that and click it!

Because we asked Azure to create the key pair for us, it will prompt us to download the private key.
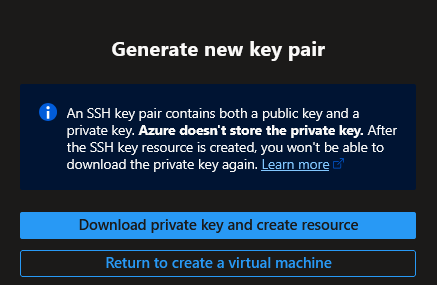
The deployment will be in progress and may take a few minutes to provision everything.
Accessing the VM
Once deployed, find the Virtual Machine and from the Overview, select “Connect”. Here should see “Native SSH”, which will allow you “Check Access” on your access. If you have failures, it does a good job on telling you why and shows you the rules.
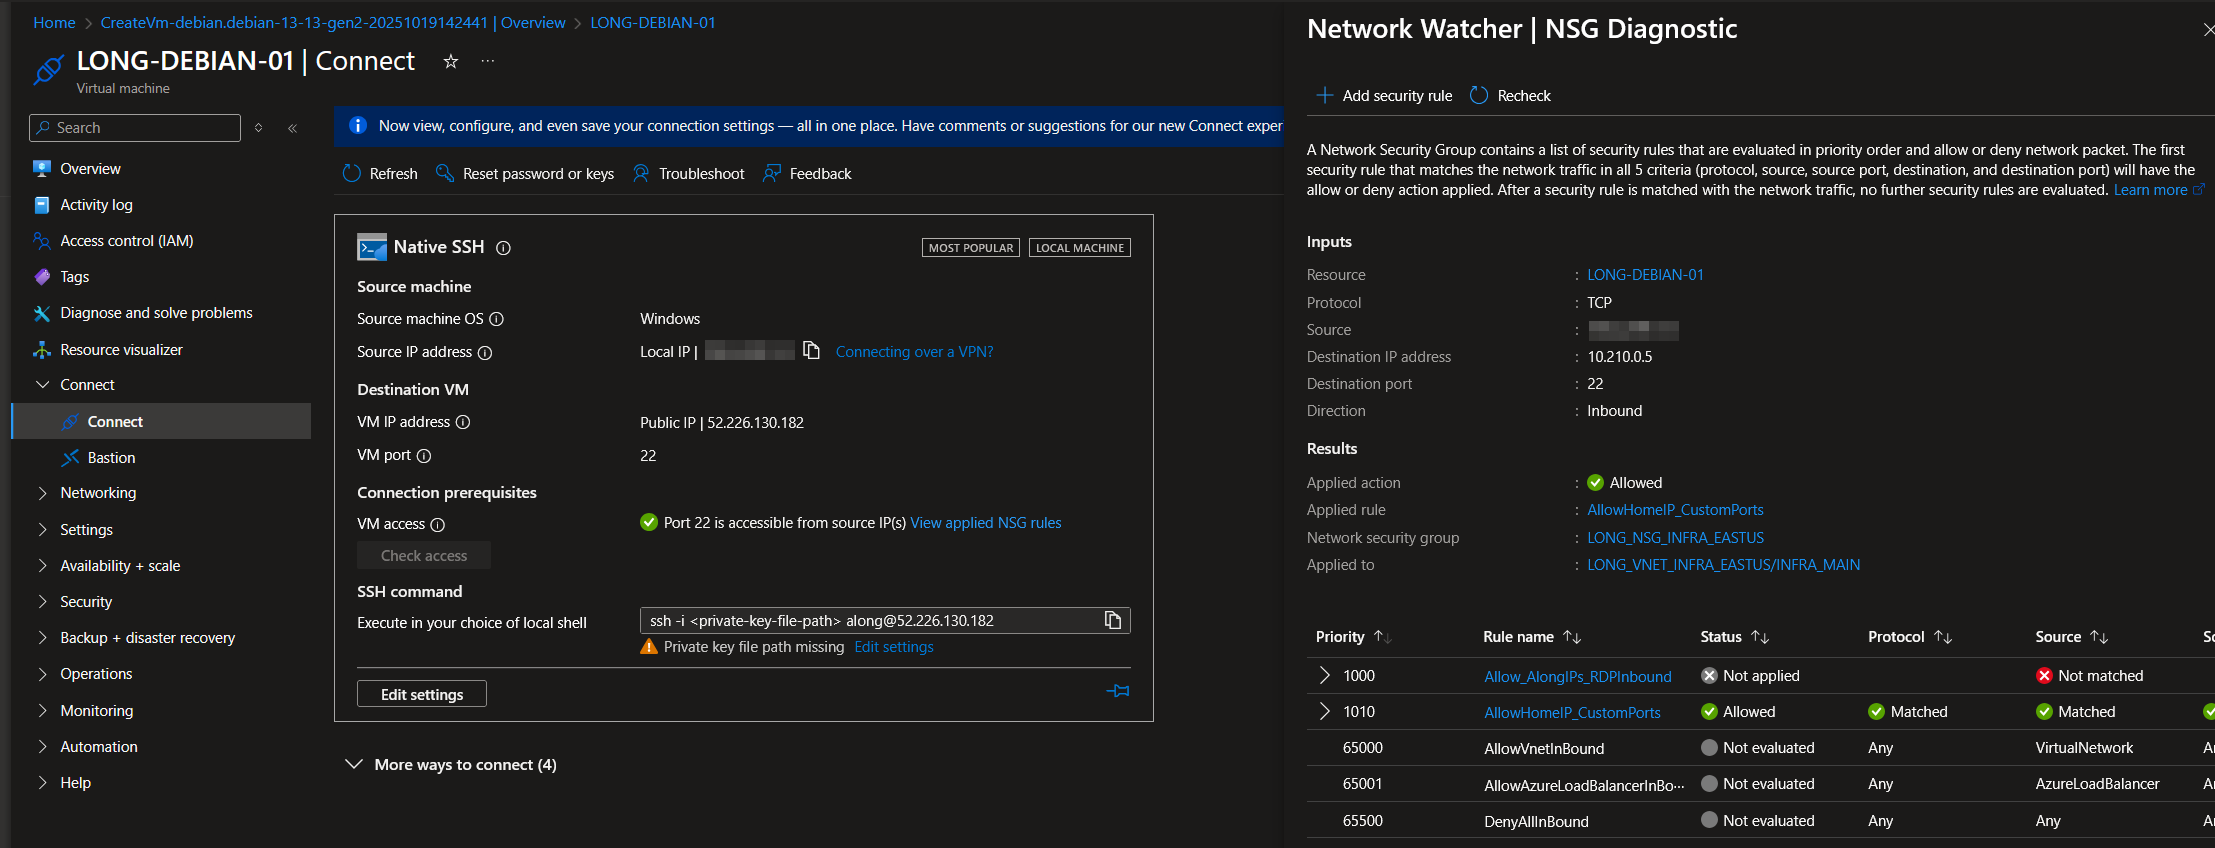
You’ll also see it gives you a great command to copy and use to SSH. We’ll specify the location of the private key that was downloaded (in .pem format)
When you first SSH, you will be provided it’s public key and asked if you trust it and if you’d like to continue. Once “yes” is selected, this will place the server in your “known_hosts” file in your .ssh folder located in your user profile, indicating a trusted public key signature.

We’re in and this tutorial is pretty much done. Have fun in your Linux instance!
However, I would like to share a few tips on SSH to make your life simple.
SSH Tips
Under your .ssh folder (located in your user home directory), create a “config” file and add your host information as follows:
Host LONG-DEBIAN-01
    Hostname 52.226.130.182
    user along
    IdentityFile C:\Users\along\.ssh\LONG-DEBIAN-01_key.pem
This will set a nickname of the host called “LONG-DEBIAN-01” and will specify the IP, user to use and the identity file location.
Now all you have to do is ssh {nickname}
We did mention earlier the risk of keeping the private key on your hard disk. I would recommend put a passphrase on your key:
ssh-keygen -p -f .ssh/LONG-DEBIAN-01_key.pem

Enter new passphrase (empty for no passphrase):
Enter same passphrase again:

Your identification has been saved with the new passphrase.
Every time you use this key, you will be prompted to enter a password to unlock the key.
Sounds like a nightmare to enter over and over. This is where we bring in ssh-agent to store the key securely on the system and automatically enter that “passphrase” for you
# start the ssh-agent in the background
Get-Service -Name ssh-agent | Set-Service -StartupType Manual
Start-Service ssh-agent

# Add the key
ssh-add "c:/Users/along/.ssh/LONG-DEBIAN-01_key.pem"
Lastly, if you’re using Windows, it’s recommended to backup your private key to a secure location and delete it from your local system after you add it to ssh-agent.
- For Linux/MacOS, these keys don’t persist past a terminal session and run from memory. In these cases, you must have your key handy.